Storage Spaces in a nutshell
Storage Spaces is a storage virtualization technology added in Windows 8.1 which allows the organization of physical disks into logical volumes, in a similar fashion to LVM on Linux. Those logical volumes behave like regular physical disks to the user, with the added benefits of data redundancy and thin provisioning of disk space.
Features Link to heading
Storage Spaces works by grouping together various physical disks into a storage pool. It is not required that all disks share the same capacity, physical format (mechanical, solid state, flash memory) or even the same type of connection (SATA, USB, iSCSI, etc.) to the host system. This gives users the ability to set up storage pools with advanced features such as SSD caching, storage tiering (automatically moving more used data to faster storage and lesser used data to slower, higher-capacity storage) and varying levels of resiliency. Futhermore, Storage Spaces can leverage the full potential of the ReFS filesystem, which includes data self-healing, copy-on-write, improved reliability over NTFS, etc.
Configuration Link to heading
Storage Spaces are thinly provisioned, meaning that the capacity of the storage spaces can exceed the capacity provided by the physical storage (more storage can be added when is needed). When creating a Storage Space, it is possible to choose between four levels of resiliency, those being:
- Simple: No resiliency, requires at least one physical disk
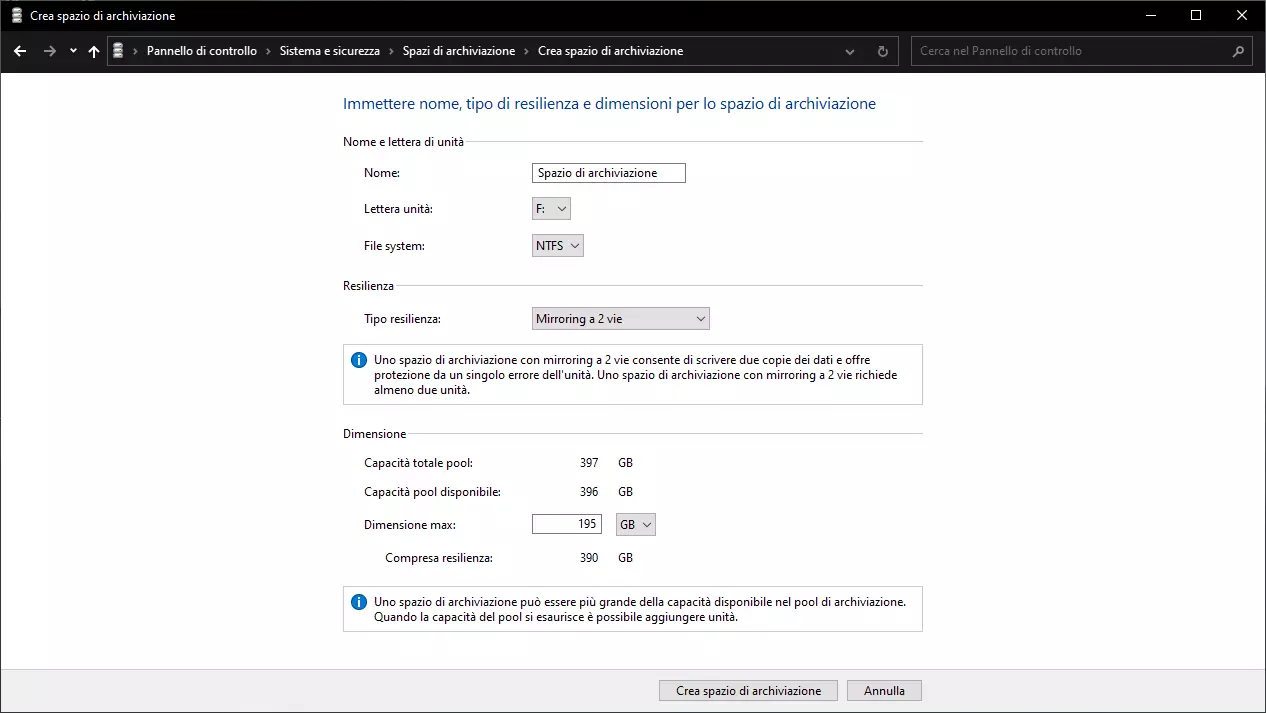
- Two-way Mirror: Writes two copies of every file to the storage space, requires at least two physical disks
- Three-way Mirror: Writes three copies of every file to the storage space, requires at least five physical disks
- Parity: Stores parity data in each disk to rebuild the data in the event of hardware failure, requires at least three physical disks
A storage space can be setup either from the Control Panel or from PowerShell.
Control Panel Link to heading
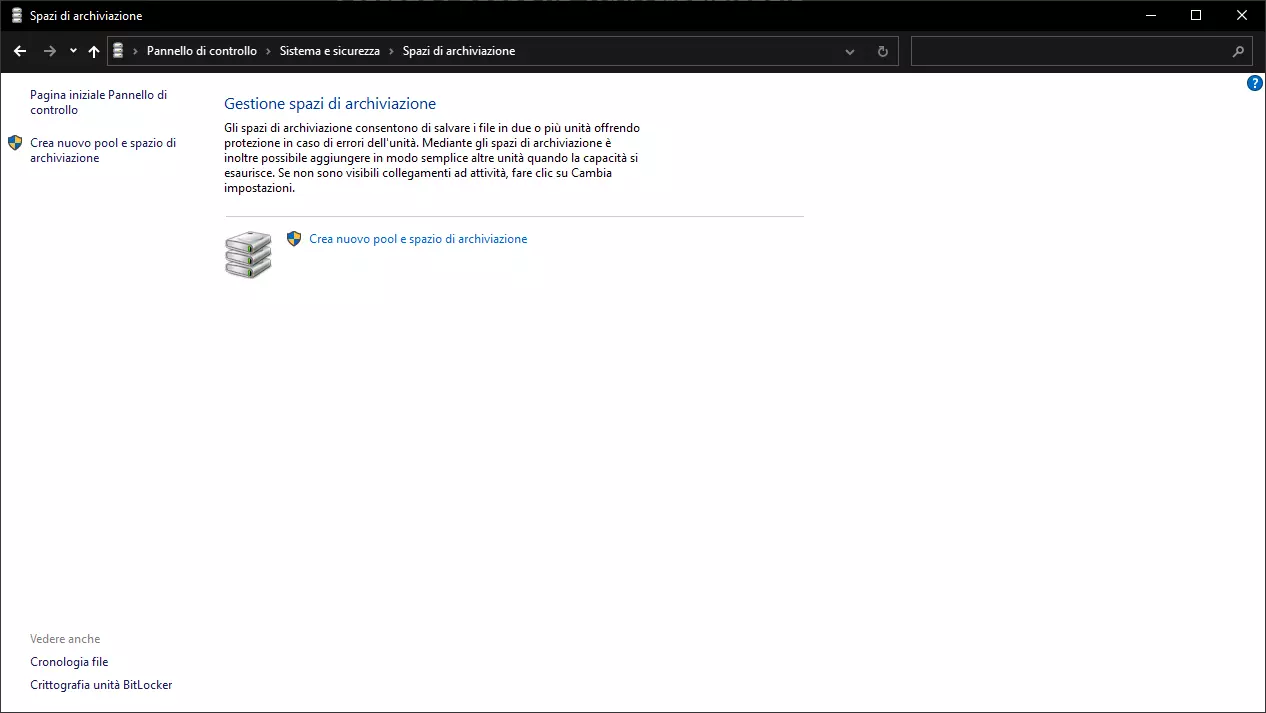
Go to Control Panel > System and Security > Storage Spaces

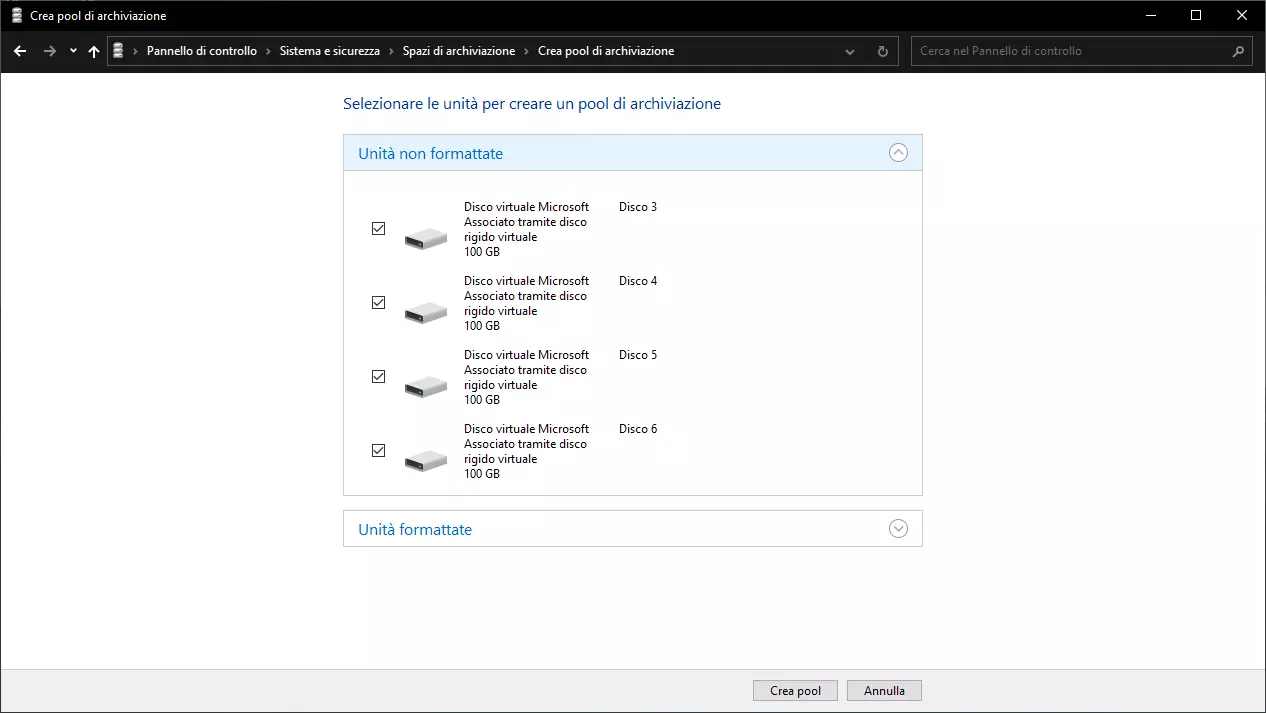
Click on “Create a new pool and storage space”, then select the disks you want to add to the pool. Make sure each disk is blank

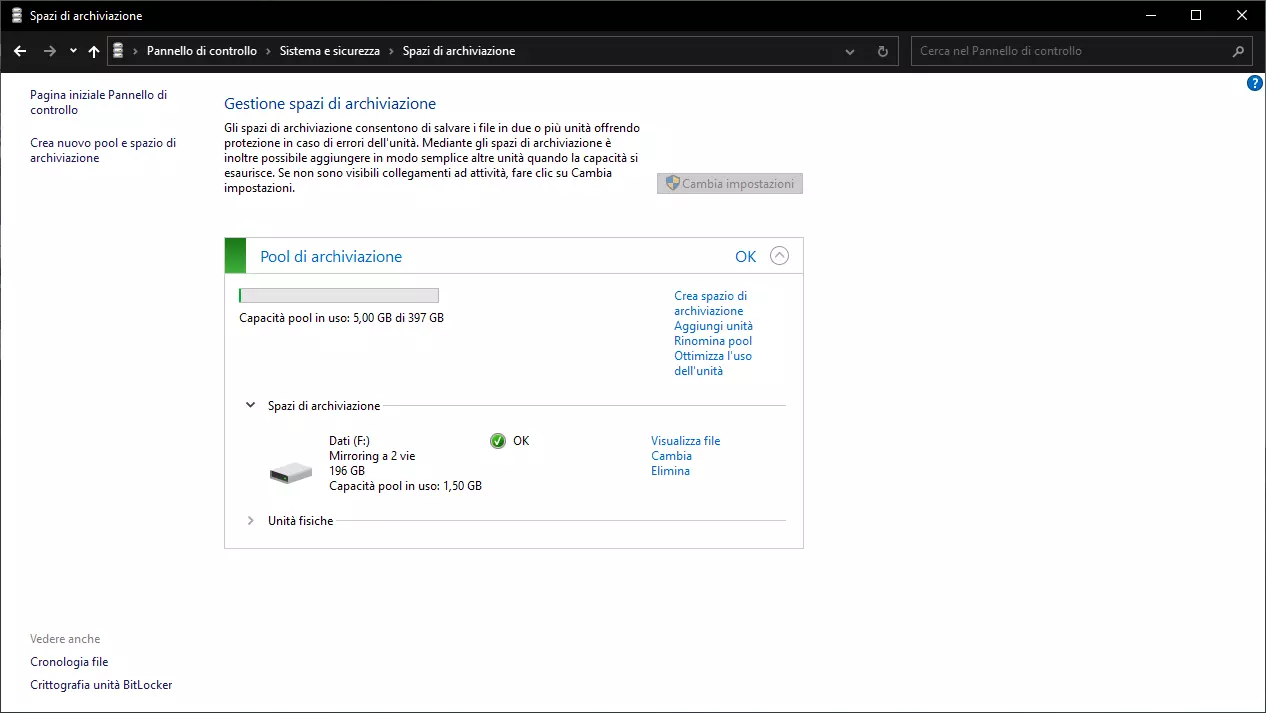
Configure your storage space, then add it to the pool

All done ✌️

PowerShell Link to heading
Select the available disks:
$PhysicalDisks = (Get-PhysicalDisk -CanPool $True)
$PhysicalDisks variable to make sure you have selected only the disks you want to put into a storage poolNext you’ll need to create a storage pool with the disks you have selected. Type:
New-StoragePool -FriendlyName MyData -StorageSubsystemFriendlyName "Windows Storage*" -PhysicalDisks $PhysicalDisks
Now you’ll need to add a storage space to the pool. In this example I’ll create an NTFS-formatted mirror space. Please refer to Microsoft’s documentation to learn about all the different configuration options. To create a blank mirror space, type:
New-VirtualDisk -StoragePoolFriendlyName MyData -FriendlyName MyMirrorSpace -ResiliencySettingName Mirror -UseMaximumSize
Then to initialize it, type:
Get-VirtualDisk -FriendlyName MyMirrorSpace | Get-Disk | Initialize-Disk -Passthru | New-Partition -AssignDriveLetter -UseMaximumSize | Format-Volume -FileSystem ntfs
External links Link to heading
Storage Spaces: Frequently Asked Questions (FAQ) | Microsoft Learn